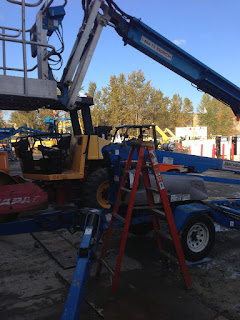
I recieved a forklift that someone else was working on. They said that it was blowing fuses and that the mast was locking out after it was washed. I originally thought I was chasing a short to ground since it was blowing fuses. I was looking for where a wire was rubbed through and grounding to the frame but found none. I checked all the fuses with a meter and they were good, but the mast spool was still locked out. All the relays were clicking and working. I took a step back and started over since I couldn't replicate the alleged electrical problem.
There are two solenoids on the machine:
One for lift and the other one for tilt. I tore off all the panels to get to the solenoids. I switched the pigtails for them to see if the problem followed to the tilt cylinder. That way I would know if it was electrical or hydraulic. The problem didn't folllow it so I knew it was the solenoid. To verify I put power to the solenoid and it didn't click like it should. Bad lift solenoid.
40hr
280hr
Tuesday, March 22, 2016
Wednesday, March 16, 2016
Simple things and not so simple things
The simple task was changing track pads for an excavator. As usual I used the bucket as a jack, and turned the track so I could get at the shoes that needed to be replaced. I was unable to get the bolts of with a 1" gun so I ended up using a torch to heat up the nut and then quickly remove the bolt. After the shoes were removed I was careful to clean the mounting surface on the chain and the bottom side of the track pad.
The not so simple thing was a no start compressor that has been having the issue on and off for a while now. Several mechanics have worked on this and it has a brand new alternator, battery etc. When I cranked it over it sounded like it was starting under compression but it was hard to tell. It also cranked but not very strongly.
The first thing I did was remove the unloader valve and I ended up finding a pretty sizeable groove in it and when you moved it with your fingers it seemed to stick. I sanded down the groove with very fine emory cloth, and reassembled it.
40hr
240hr
Tuesday, March 8, 2016
Man lifts
Many of our scissor lifts go out for paint and when they come back they require a full decal kit. It is a precision job that require attention to detail if you want to do it right. If you rush it just looks terrible and all the decals are in the wrong place or missing. There are quite a few decals to look up for location and it's not fun and exciting but it still has to be done. The best part is if you do a good job and it looks nice they give you more of them...yay.
40hr
200hr
40hr
200hr
IR 1300
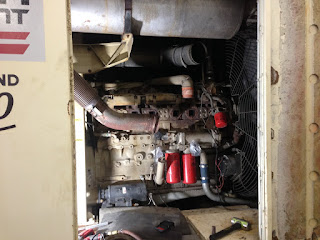
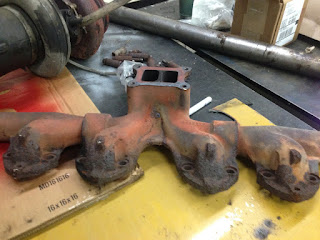
I ended up getting a job for a large compressor that involved a cracked exhaust manifold. It happened to be fairly old so my main concern was not breaking the bolts to the exhaust manifold. That would add hours to the job, so I did the smart thing. Instead of just using an impact to take them off which would surely break most of them I used a breaker bar to walk them back and forth until the would move freely. Only then would I use an impact to get them off. Of course there were several things in the way being held on with rusty components that had to be removed.
40hr
160hr


40hr
160hr


 |
| everything removed and out of the way |
 |
| Old cracked manifold |
 |
| Turbo and air assembly |
 |
| New parts and a Stanley Thermos. |

Dozer Woes
Had some simple yet tedious tasks for a dozer that came in. It had several broken bolts for the hood that had to be extracted. A couple of track pads had to be replaced with some new pads and plow bolts.The main problem was that there was a hydraulic leak that turned out to be the filter. The reason for it was during the 1000 hour service the technician did not oil the filter gasket so it didn't seal properly. Also the put it on so tight that I had to use a strap wrench and give myself a hernia to get it off. During my inspection I also noticed there was several inches of much caked in the bottom of the engine compartment which could only lead to trouble down the road. Therefore I received the glorious task of removing all the belly panels and digging out all the mud. On the plus side I found two wrenches while doing so. :)
40hr
120hr
40hr
120hr
 |
| Big Iron |
 |
| Track pads |
 |
| Panels removed with a jack to support them. Broken fingers hurt. |
 |
| source of the hydraulic leak |
 |
| Always a good idea to jack the blade while you are under it |
Sullvian 185 compressor
I had to diagnose a compressor that would not get up to operating temperature. Originally it was just a 250 hour engine service, but while getting the unit hot I noticed it never got up to operating temperature. I troubleshot to verify the coolant gauge was working properly. It had good power and ground, but I also used a temp gun to make sure what it was displaying was the same as the temperature by the thermostat. I diagnosed it to be a partially stuck open thermostat and got the go ahead to take it apart and find out. Removed all the hoses and thermostat to find a piece of rust that jammed the thermostat. Diagnosis correct.
40hr
80hr
40hr
80hr
 |
| radiator tube off and the thermostat is in that coolant |
 |
| 185 compressor |
 |
| Had to get the thermostat from John Deere and not Sullivan |
 |
| You can see how tight the work area is. |
Monday, February 1, 2016
Allmand Night light pro
I had an Allmand night light pro that needed a new control box and wiring harness. The old control box was having problems because the glow plug switch wasn't working properly. The plastic fatigued and work hardened to the point where it wouldn't let the switch move freely. To prove it I cut out the plastic covering the push button switch and it worked fine. I was given the parts and proceeded to rewire the unit. After I was finished the unit would start, but the motor would cut off after 5 seconds. It would do this two more times before throwing a failure to crank code.
After troubleshooting all the safety switches (coolant temp sensor, oil pressure sensor, starting/charging system), as well as testing the alternator. There was no alternator output under load when I was troubleshooting this problem. One thing I tried was going into the computer parameters and turning off the safety parameters for generator input but that didn't work.
I put on the old wiring harness and control box and the unit ran fine. I called manufacturer and asked if there was a wiring harness or control box update. I explained the failure to crank code and the rep told me that the control box wasn't seeing generator input so it was shutting itself down as a safety switch. In the provided harness there was supposed to be something for pins 8 and 9 that provided generator input and a ground for the control box. For whatever reason the part numbers were all correct but there were still wires missing for the control harness.
What I ended up doing was making my own ground for the control box pin and also creating my own wire for the generator input. I ran it from the pin on the control box through the frame and onto the breaker switch and not after the GFCI. If I had ran the wire so it was after the GFCI in the circuit then whenever someone tripped it the motor would shut off. That would certainly turn into a service call for a no start.
40hr
40hr
 |
| Breaker switch with wire I made for generator input. |
 |
| Old control box that did not require generator input. |
 |
| Allmand Night Light Pro is tow-able with four halogen service lights. |
 |
| You can see the white wire I ran through the frame. Put a grommet in there so the wire didn't rub which could lead to a short to ground. |
 |
| New control box with the hour it was changed at. |
 |
| New control box. We've only used these on compressors until now. |
 |
| Marathon generator. |
Subscribe to:
Posts (Atom)


